Saturday, May 29, 2010
Buckets Full of Strawberries
This morning I went strawberry picking at Honey Bear Orchards in Lebanon, PA with my lovely in-laws and my husband. We went a little crazy with the whole picking thing and ended up with 36 quarts total! That's a little over 50 pounds! We were definitely not planning on getting that much. I am going to be super busy now with freezing, eating and canning strawberry jam.
Thursday, May 27, 2010
CSA Week 2
This sweet little kitty greeted me as I picked up my second week's share of veggies from the farm. I just love that there was a cat just chilling out on the strawberry table. He was super nice too and made me pet him for like 10 minutes. I also love how these farmers are just so trusting. They let us walk around their farm and pick up veggies without anyone around but the cat. It's pretty awesome.
Wednesday, May 26, 2010
Granola!
I typically follow a recipe from the The Family Homestead. It's very tasty and simple. One of the only changes I make to the recipe is that I don't add the coconut, mostly because I never have any. Also, if you're interested in reducing the amount of honey and oil that you need, some applesauce can be used instead. There really are tons of granola recipes online so if this one doesn't strike your fancy you can always try other ones. The general process is typically very similar from one to the other.
You first mix up all of your ingredients in a bowl.
Then spread your mixture on some baking sheets and bake at 300 F. It usually takes about 45 minutes and its important that you stir it about every 15 minutes to make sure it cooks evenly. This is really the only slightly annoying part of the process since you have to be around to check it every so often.
Once it looks done you pull out the granola and let it cool. Then you gobble it all up. The end.
Running today: 2.1 miles
Tuesday, May 25, 2010
Slug Wars!
I've been noticing for a while that something has been nibbling on my vegetables, but I haven't been able to figure out what. However, last night I was out in my garden a little later than usual and discovered slugs crawling all over my plants! Boy did it make me mad. So they are what's been eating my plants! Well, I was not having it, so I picked off every last slug I could find and tossed them in the woods. There were literally hand fulls of them. Needless to say, it was not the most enjoyable experience of my life.
What's fairly ironic about this whole slugs and beer thing is that my husband and I are on a budget and on account of alcoholic beverages being a tad unnecessary as well as on the expensive side, we really have not bought beer or any other alcohol in months. And now that we finally buy some beer it's going straight to the slugs.
I'm really sorry about putting this up here, but I just had to.
I just want others to really understand what I've been through.
After setting up my slug traps I went hunting for any slugs I could find and unfortunately I found some. I ended up sticking them in a cup until I could dispose of them. Here's a picture:
Monday, May 24, 2010
31 in 31 Days
1.) Bake cookies.
2.) Complete a 4 mile run.
3.) Finish The Backyard Homestead by Carleen Madigan.
4.) Go for a walk in the woods.
5.) Finish knitting the sock that I started a while ago.
6.) Pick strawberries and make jam with Brittany @ Little Miss Scatterbrained, Amy @ Little Miss Moon Blossom, Genevieve @ Lil Miss Explorer and maybe even Kara @ Lil Miss Wisecracker.
7.) Finish planning my trip to Chile in August! I still have so much to do and the trip is coming up so fast!
8.) Can another batch of beans.
9.) Organize my disaster of a hall closet.
10.) Finish Ina May’s Guide to Childbirth.
11.) Wander around the library.
12.) Sit on a park bench.
13.) Harvest and eat beets from the garden.
14.) Extend the height of the garden fence.
15.) Do something with the extra bird cage that is just sitting in my apartment.
16.) Organize my recipe box.
17.) Finish the blanket I’ve been crocheting.
18.) Sew an apron.
19.) Log onto Second Life to hang out with Lantern and Brocair (my uncle and grandmother).
20.) Finish reading Pushed by Jennifer Block.
21.) Talk to my friend Jody about bee keeping.
22.) Pick up horse poo for the garden.
23.) Make fried lentil balls.
24.) Clean my refrigerator.
25.) Participate in Chinese Thursday at work (we all order Chinese food together).
26.) Throw a disc (Frisbee) around.
27.) Stake, cage and/or trellis tomato plants.
28.) Give myself a pedicure.
29.) Modify some giant t-shirts that I have so I can actually wear them.
30.) Go to JoAnn fabrics.
31.) Sell some stuff at a flea market or yard sale.
Running
Saturday: 2 miles
Today: 2.4 miles
Friday, May 21, 2010
Quick Garden Update
Yesterday I did my second planting of green beans and cucumbers. I'm hoping to have enough cucumbers to make into a bunch of pickles. I also planted some okra, but I actually have no idea what okra plants look like so this will be an interesting surprise.
Thursday, May 20, 2010
First CSA Pick-Up
Today my mom and I ventured to Calvert's Gift farm to pick up our first share of vegetables and walk around the farm. Here is what was included this week:
Bok Choi
Spinach
Spring Salad Mix
Carrots
Strawberries
Scallions
We also got to pick up a few extras that they were offering. That white bag is full of a mix of kale, collards and chard. They also had some pea shoots and arugula which I threw in with my salad mix. My mom got those shitake mushrooms for asking the owner a question. See what happens when you ask questions- you might get some fungus.
Overall I am quite happy about all the veggies we got and I am excited to try them, although I already know the strawberries are sweet and delicious.
Wednesday, May 19, 2010
Homemade Yogurt
1.) Place your milk in a pot and bring it almost to a boil. I like to get mine just hot enough to start seeing a little steam. This will help kill off any bacteria that might be in your milk to begin with.
2.) Let your milk cool down so that it is warm but not hot. If the side of the pot is a comfortable temperature on your wrist then it's probably fine. Some people use thermometers to make sure it's just the right temperature, so you can definitely do that. However, my yogurt has turned out just fine without it.
3.) Mix in your yogurt. I use a whisk to make sure it gets mixed well and any clumps are broken up. For a whole gallon of milk I'll use an entire 6 oz container of yogurt although you could probably get away with using less.
4.) Transfer the yogurt to a clean storage container. I used two large plastic containers this time.
5.) Place your yogurt mixture in a warm place overnight. I simply use my oven; it has a pilot light so it stays warm all the time. I've also heard of people warming up the oven just a bit, then turning it off. With the door shut it should retain a good amount of heat over night. Another option is to turn on your oven light. That should warm up the oven just enough to make it a happy place for your yogurt to develop.
6.) Take out your yogurt in the morning and place it in the refrigerator. It is now ready to eat.
One cool thing about yogurt is that once the active cultures are established they are very good at out-competing other bacteria. This means that your yogurt will not spoil easily. Over time however the yogurt will get even more sour and tangy, so it might not be as tasty to eat. I typically won't keep mine for longer than a month.
I have found a few differences between homemade yogurt and store bought. My yogurt tends to be a bit thinner. It works great for smoothies and it doesn't bother me one bit. Typically an additive such as gelatin or pectin is added to the store bought yogurt to make it thicker, so don't feel bad if your yogurt doesn't turn out the same. My yogurt also tends to taste a little different than what I am used to getting at the store. It can be fairly sour and tangy, whereas I'm used to thinking of yogurt as being more sweet tasting. That's mostly because a lot of what you can buy in the store has so much added sugar and flavorings that you can hardly taste the actual yogurt in there. Just be open minded with homemade yogurt if you're not used to un-flavored and un-sweetened yogurts. Sometimes the natural tanginess of the yogurt can be a little much for me so I often add a little sugar and/or fruit. I also love mixing in some vanilla extract.
Running today: 1.5 miles.
Tuesday, May 18, 2010
Growing Onion Seeds
Please note the lovely view from my apartment- yup that’s a sound barrier.
I did a little research because I didn’t know too much about onions. I was sort of hoping that if I let these grow in my garden then some how they’d make me more onions. Apparently, however, that’s not the way they work. From what I understand these will continue to grow then make flowers and finally produce seeds. Then next year these seeds can be planted and they will grow into onions. Therefore my plan is to put these in my garden let them go to seed then harvest and dry the seeds to use next year to grow onions. It does seem like a bit of a long process and I’m sure that it would be much easier to go out and buy a packet of onion seeds but this seems much more exciting. Plus I'll get to learn a lot more about the process of seed saving. I’ll let you know how it goes.
For now, here’s a picture of them actually in the ground. I think they look cooler in the glasses though.
Weekend Update
Friday, May 14, 2010
Community Supported Agriculture
Last year I participated in One Straw Farm's CSA program. It was a great experience. I got to enjoy delicious organic produce every week while learning more about what vegetables are typically grown at what time in Maryland. I even got to try some vegetables that I wasn't too familiar with like chard and bok choy. I highly recommend One Straw Farm to anyone looking for a CSA around Baltimore. All of the people are extremely friendly and they have tons of drop off locations that make it convenient to pick up your produce. I'm pretty sure that they still have a few openings left for this year, so if you're interested you can sign up on their website: http://www.onestrawfarm.com/.
This year, however, we decided to try something new just for the heck of it, so we went with the Calvert's Gift Farm CSA (http://www.calvertsgiftfarm.com/) . They are a smaller organic farm and instead of picking up your produce at drop off locations, you go directly to the farm to get your veggies. I like that I'll be going to the farm every week- it makes me feel as though I'll be more connected to the whole process . Another cool benefit to this program is that they offer free pick-your-own blackberries (can anyone say blackberry jam!) as well flowers. In addition, along with the vegetable share, you have the option to participate in an egg share where you get a dozen eggs either every week or every other week. These eggs come from another local farm where the chickens are treated nicely and given plenty of space and access to the outdoors. Overall I think this program seems pretty cool, so I'll keep you posted on how it goes.
If you're not located near Baltimore but are still interested in CSA, don't give up hope. There may be a CSA program in your area, and who knows it might not be too late to sign up for it. You can find a list of links to help in your serach for a CSA near you at www.nal.usda.gov/afsic/pubs/csa/csa.shtml.
Doomed
Look who decided to join me.
Of course its cute now, but I guarantee that as soon as I start making progress and he comes over, rips up puzzle pieces and throws them half way across the room I won't find it so cute anymore. I guess that's just what I get for letting my parakeet play with puzzles.
Thursday, May 13, 2010
Canning Beans
Here are some of the things you need when canning beans:
For some foods you can just use boiling water, but with beans you need to heat your food to higher temperatures to kill off all of the bacteria and spores that can spoil your food and this requires the pressure canner. Next you’ll need some mason jars. I’m using pint sized jars but you can also use quarts if you want to can larger quantities. You’ll need some lids, which will form a seal on your jars, and you’ll need some screw bands to keep those lids in place until they seal. The funnel is just the right size for the jars so its helps you fill them without making too much of a mess. Those green and black things are jar tongs which are useful for picking up hot jars.
Beans are also nice to have when canning beans.
I’m using 2 lbs. of Great Northerns simply because they are what was lying around.
Now we're ready to get started.
Step #1: Soak your means overnight.
Step #2: Discard the water you soaked your beans in. Add more water and boil for 30 minutes.
Step #3: Prepare the rest of your equipment. Get together your jars, lids and screw bands. Wash your jars and get them warmed up (hot food + cold jar = cracked glass).
Step #4: Fill your jars. I like to add the beans first.
Don't fill them all the way with because the beans will continue to absorb water and expand in the pressure canner.
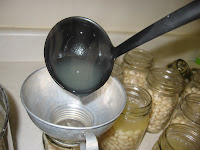
After you've got your beans in there its time to pour in the liquid. I like to use the remaining cooking liquid but you can also use boiling water.
Make sure you leave 1 inch of space between the top of the liquid and the top of the jar (called headspace) since food and liquids like to expand when hot. You want some air to escape since that's what helps create the seal but you want your food to stay in the can so the extra space helps to ensure that.
Step #5: Place your lids on your jars and secure them with the screw bands.
Step #6: Put your cans into the pressure canner, put on the lid and turn up the heat.
Step #7: Let the pressure reach 11 lbs and adjust the heat to maintain that pressure. Continue to cook for 75 minutes for pints and 85 minutes if you used quart jars.
Step #8: Once you’ve processed your jars for the required amount of time turn off the stove and let the pressure in your pressure canner drop all the way.
Step #9: Next remove your jars from the canner. This is where the tongs come in handy.
Hopefully at this point you’ll start to hear the amazing popping sounds that the lids make when they form seals. It’s really quite a joyful sound because it means that all of your hard work has paid off. If any of the jars do not seal you need to either dispose of them or stick them in the refrigerator right away and eat them in the next few days, they will not be safe to store long term. Let the jars continue to sit there overnight undisturbed.
Step #9: The next day remove the screw bands and wash your jars.
Step #10: Now all you have to do is store your jars in a cool dark place until you are ready to eat them.
Running Log
Tuesday, May 11, 2010
A Radish!!
Do you see it? Its so cute and pink. I have to admit that I was a bit surprised to see a it, as though I still doubt whether or not my garden will produce anything. But this proves it, I will at least have one radish.
And now I know you're just dying for more pictures from my super exciting garden so I won't keep you waiting any longer.
Here are the rest of the radishes. They really are growing like weeds compared to the other plants started at the same time.
A beet plant!
And lettuce! See, I have two different varieties.
Here are all of the plants that I have yet to plant outside. In the back are the tomato plants (which are getting quite leggy) and towards the front are some herbs and marigolds. I've heard that marigolds can be good at keeping away various insects and other pests that aren't so nice to your vegetable plants.
Unfortunately it continues to be too cold at night to get these in the ground. Tomato plants are very sensitive to frost so I don't want to take any risks. So for now I'll keep working on hardening them off. I leave them outside during the day to let them get used to being out there but I bring them inside the house if there is a chance for frost at night.
Monday, May 10, 2010
Looming Distractions!
This past weekend my wonderful aunt, who is a big puzzle fan, gave me this gigantic stack of puzzles to take home with me. Ever since they have been calling to me, begging me to start them. But I must resist as long as possible for I have a problem. Once I start a puzzle I am addicted- I have to finish it. The world is not right until it is complete. Even if I try to get away and do something else it eventually pulls me back. So you see, I must continue to resist the calls of the puzzles because if I don't, nothing will get done around here. The garden will go unweeded, the dishes will pile up, my husband will go hungry and I will lose a great deal of sleep over it. I don't know how long I will hold out. That one with the gumballs is especially tempting...
Sunday, May 9, 2010
And now for a real post- My Garden!
Look at the photos of my lovely garden!
It’s definitely a good amount of room for a first time gardener!
So far I’ve planted chard, lettuce, beets, broccoli, radishes and Brussels sprouts. The radishes are by far doing the best and unfortunately the broccoli is practically non-existent.
Here’s a picture of the radishes from a week or two ago.
And here’s a beet plant.
Indoors I’ve got some tomato and pepper plants started. They’ll go in the ground soon.
Stay tuned for many more updates from the garden.